
Adaptive clave holder for one-handed use
Click here to hear this blog post read by Jess.
Claves are a staple instrument in our teaching repertoire. They are intuitive to use, make a satisfying clink sound, and can lead to all sorts of imaginative and creative play. However, as designed, they require two strong hands and motor control in at least one arm, and not all of our students have the full use of their hands and arms, or they have limb differences. If they have use of one arm, an adaptive clave holder can give them full access to performing on claves.
One option for a clave holder is a simple but well-designed commercial product called the Clave Companion by Rhythm Works, available from online merchants like Music Is Elementary. The body is a hollow, open-topped resonating chamber made of wood. A pair of elastics hold a clave above the resonator, resting on two felt blocks. The resonator helps to naturally amplify the sound of the clave, although it is not easy to grasp without also touching and dampening the clave itself. It can be attached to the tray or arm of a wheelchair with care using zip ties or a clamp.
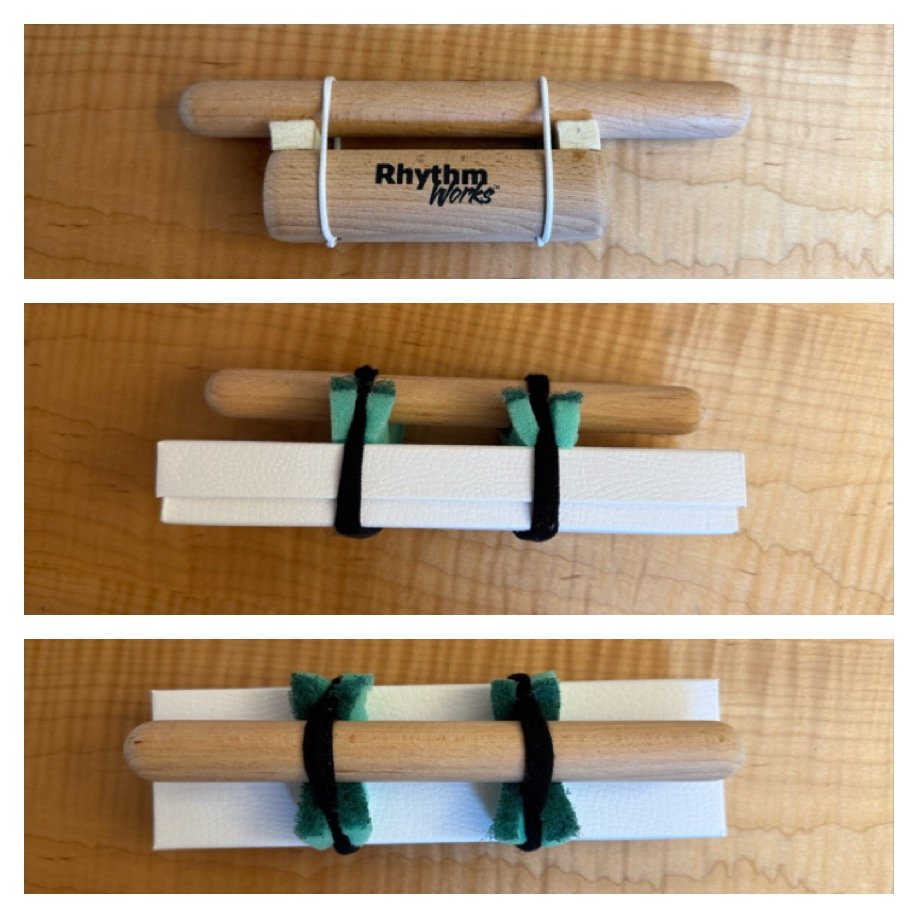
The top image above shows the Clave Companion by Rhythm Works. The middle and bottom images show two views of our homemade clave holder, described below.
Because the Clave Companion is a little tricky to hold, we set out to try to construct our own low-cost clave holder. At the local Dollar Tree we purchased a variety of experimental materials. After extensive experimentation, our best design used an oblong cardboard necklace box, a package of scrubby sponges, hair elastics, and optional hair scrunchies– a total of $5 of materials (with lots leftover).
The video above provides a clear visual of how to make your own clave holder. The basic steps are these:
Cut strips of sponge about ¾” wide. The length of the strips should be roughly equal to the width of the box top. Use a knife to cut a diagonal notch on each of the short ends to hold the hair elastic in place, scrubby side up.
Before hot gluing the sponges onto the box top, experiment with their placement for the best sound quality. Place a sponge on top and hold it in place with a hair elastic, making sure to insert the elastic into the notches. Repeat with the other sponge and elastic, then slide a clave under both elastics but on top of the sponges. Test the sound quality with the sponges placed at different distances of separation. We found that ours sounded best when each sponge was placed at approximately ⅓ the length of the clave. Lightly mark the sponge locations on the box top with a pencil, then remove the clave, elastics and sponges.
Use a hot glue gun to glue the sponges in the marked places.
Replace the elastics and clave.
If needed, secure the clave holder so it won’t move when struck. The extra length of the box beyond the ends of the clave makes it possible to attach to your arm using hair scrunchies, or to clamp or zip tie it to the arm of a wheelchair. (Never use zip ties on a student’s body.)
The proper way to hold a clave (unassisted) is not actually by grasping it, but curving your fingers into a partial fist and placing the clave lightly above the channel created by the hand shape. This allows it to resonate freely when struck. In younger classes, this technique can be taught as an extension, while some students use a simple grab hold and others use a clave holder as needed. Happy clicking!
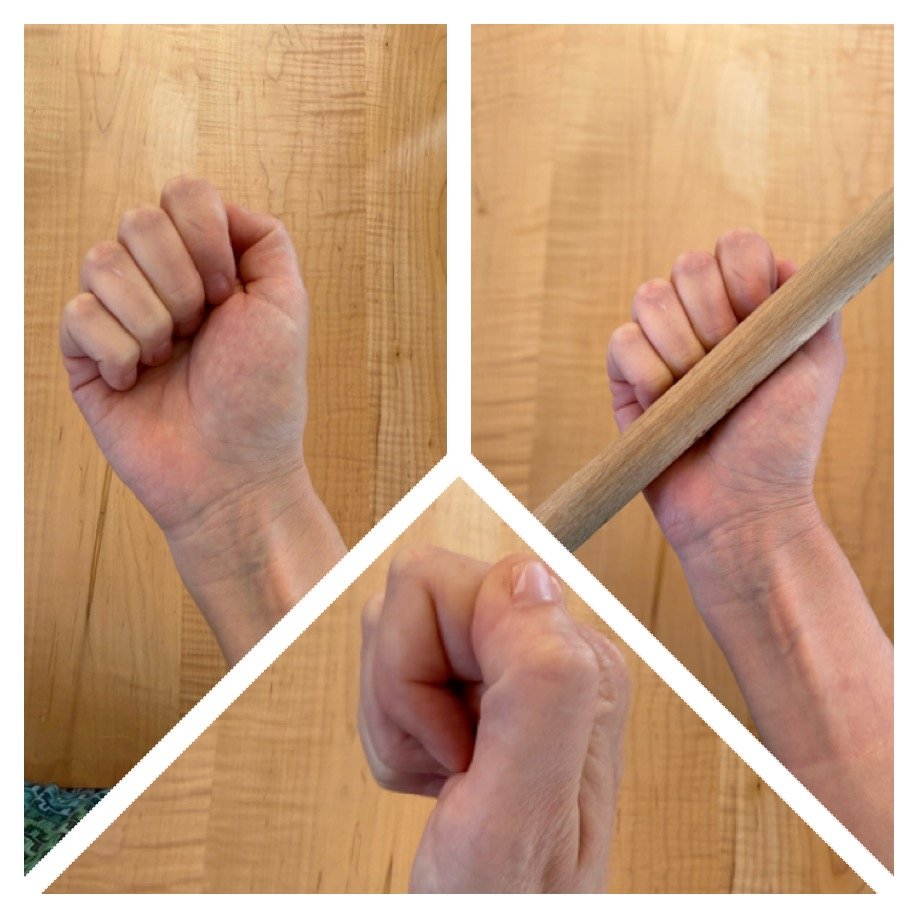
The three images above show the proper hand position for holding a clave so that it resonates when struck, instead of producing a dampened sound.